Pink Airbrush Nails: The Ultimate Guide to Designs, Shapes, and DIY Techniques
Introduction to Pink Airbrush Nails
The beauty industry is currently witnessing a massive resurgence of retro nail aesthetics, and leading the pack is the hypnotic, ultra-smooth look of airbrushed nails. Among the infinite color options available, pink airbrush nails have taken the internet and high-fashion runways by storm. Rooted in Y2K nostalgia and elevated by modern cosmetic technology, these nails offer a soft, dreamy look that traditional hand-painting methods simply cannot match. From clean-girl pastel blushes to high-energy fuchsias, the airbrush technique provides a seamless, velvet-like blend that mimics professional digital art.
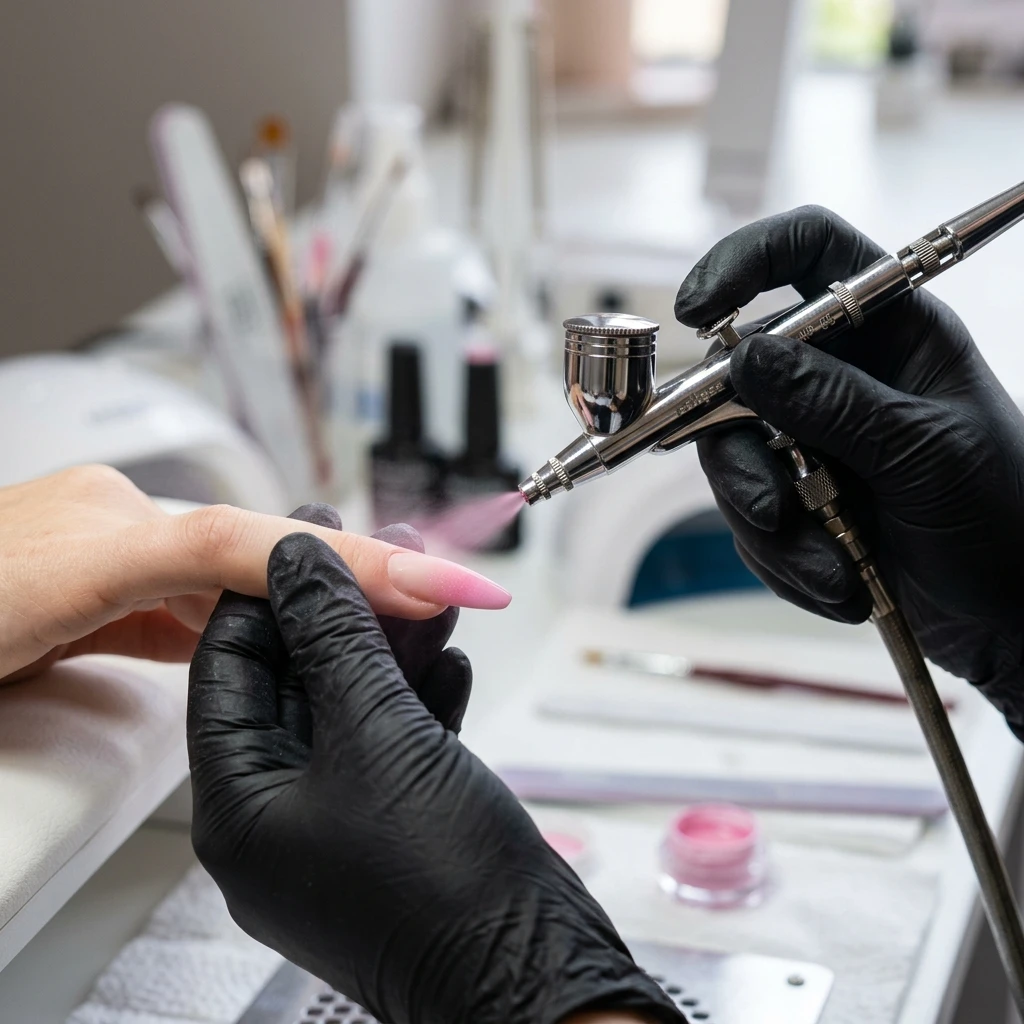
What makes the airbrushing technique so unique is how paint is applied. A specialized stylus connected to an air compressor uses compressed air to atomize liquid paint into a fine, microscopic mist. When sprayed onto the nail, these tiny paint droplets overlap to create perfectly smooth color transitions. Unlike traditional polish brushes that leave streaks, or nail sponges that leave a stippled, bumpy texture, the airbrush produces a completely uniform, flat layer. When this technique is paired with the color pink—a hue that represents playfulness, romance, and artistic versatility—the result is an absolute masterpiece.
Whether you are a professional manicurist looking to refine your clinic's offerings or an enthusiastic DIYer exploring home nail art, this guide covers everything you need to know about pink airbrushed designs. We will explore the cultural drivers behind the pink airbrush trend, analyze the key benefits of using an airbrush setup over manual tools, detail the most popular design layouts, match styles to specific nail shapes, outline the essential tools, walk through a comprehensive step-by-step DIY tutorial, and explain how to maintain your nails for long-lasting wear.
The Benefits of Pink Airbrushing for Nail Art
Choosing an airbrush application for your pink nail designs is not just about following a trend; it offers significant practical benefits that enhance the longevity, health, and visual quality of your manicure.
First and foremost, airbrushing produces flawless, streak-free gradients. If you have ever tried to create an ombre or aura effect using a standard polish bottle brush or makeup sponge, you know how difficult it is to prevent streaks, air bubbles, and uneven thickness. Sponges can absorb too much product and leave a rough, textured surface that requires heavy top coat filing to smooth out. In contrast, the airbrush gun applies paint in microns-thick layers. This creates an immediate, professional-grade gradient that requires zero manual blending.
Second, this method guarantees optimal nail plate thickness. When nail artists attempt complex gradients with builder gels or multiple layers of thick gel polish, the nail can become bulky and heavy. Thick nails are highly prone to lifting, cracking, and look less natural. Because airbrush paint is formulated with highly concentrated pigments, you only need to spray a minute amount of product to achieve full opacity. This keeps the nail structure thin, elegant, and flexible, which increases overall manicure durability.
Additionally, airbrushing saves a massive amount of time and effort. In a professional salon, efficiency is critical. Manually painting a multi-colored gradient on ten fingers can take up to thirty minutes of tedious work. With a properly set up airbrush gun and compressor, spraying a soft pink ombre across all ten fingers takes less than two minutes. The fast drying time of airbrush paints—especially water-based acrylics that dry in the air within seconds—further speeds up the appointment.
Finally, the airbrush cup allows for unlimited color customization. You do not need to buy dozens of different pink polishes. By simply adding a few drops of hot pink paint and a few drops of white paint directly into the gravity-feed cup of your stylus, you can mix custom shades of bubblegum, pastel, coral, or fuchsia on the spot. This allows you to tailor the pink shade precisely to the client's skin tone or design preferences.
Trending Pink Airbrush Nail Design Ideas
The versatility of the color pink, combined with the precision of the airbrush tool, opens up a world of creative possibilities. Here are the leading designs that are dominating the nail art scene.
1. Pink Aura Nails
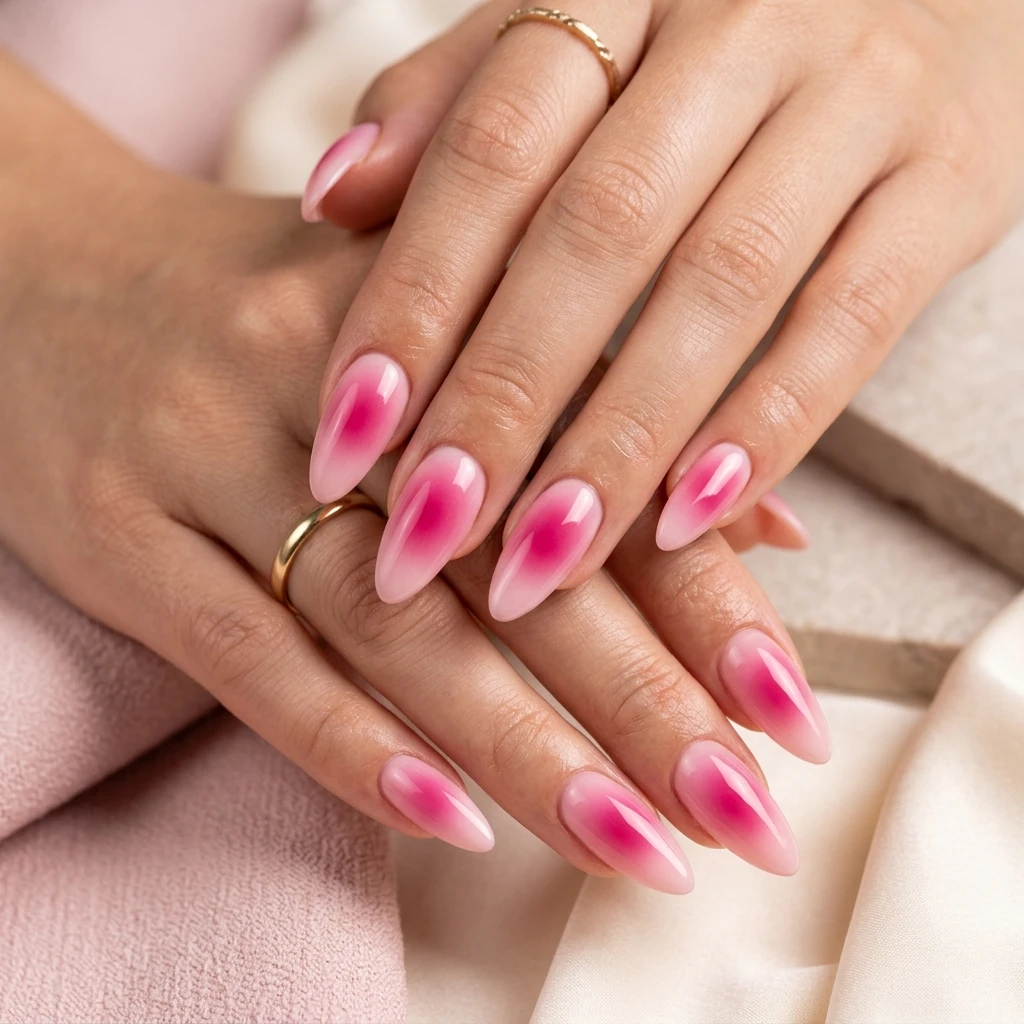
Aura nails have taken social media by storm, drawing inspiration from spiritual energy fields. This design features a soft, circular bloom of color concentrated in the center of the nail, which gradually fades out toward the edges. To achieve this, nail artists apply a neutral base coat (such as a milky white or sheer nude gel) and then spray a concentrated dot of vibrant pink or magenta directly in the center of the nail plate. The airbrush creates a soft, hazy halo that looks like a glowing light source. You can customize this by using a soft baby pink for a subtle "blush" look, or fuchsia for a bold, high-contrast energetic statement.
2. Classic Pink Ombre and Baby Boomer Nails
Also known as French ombre or baby boomer nails, this classic look is a modern, softened variation of the traditional French manicure. Instead of a sharp, white smile line separating the pink nail bed and white tip, the airbrush creates a seamless, smoky transition. The artist typically paints the nail bed with a semi-sheer baby pink, cures it, and then airbrushes a soft white paint from the free edge toward the middle of the nail. Alternatively, you can do a reverse pink ombre, where a white base is applied, and a rich, hot pink is sprayed from the tip upward, creating a vibrant sunset gradient.
3. Glazed & Chrome Pink Airbrush Nails
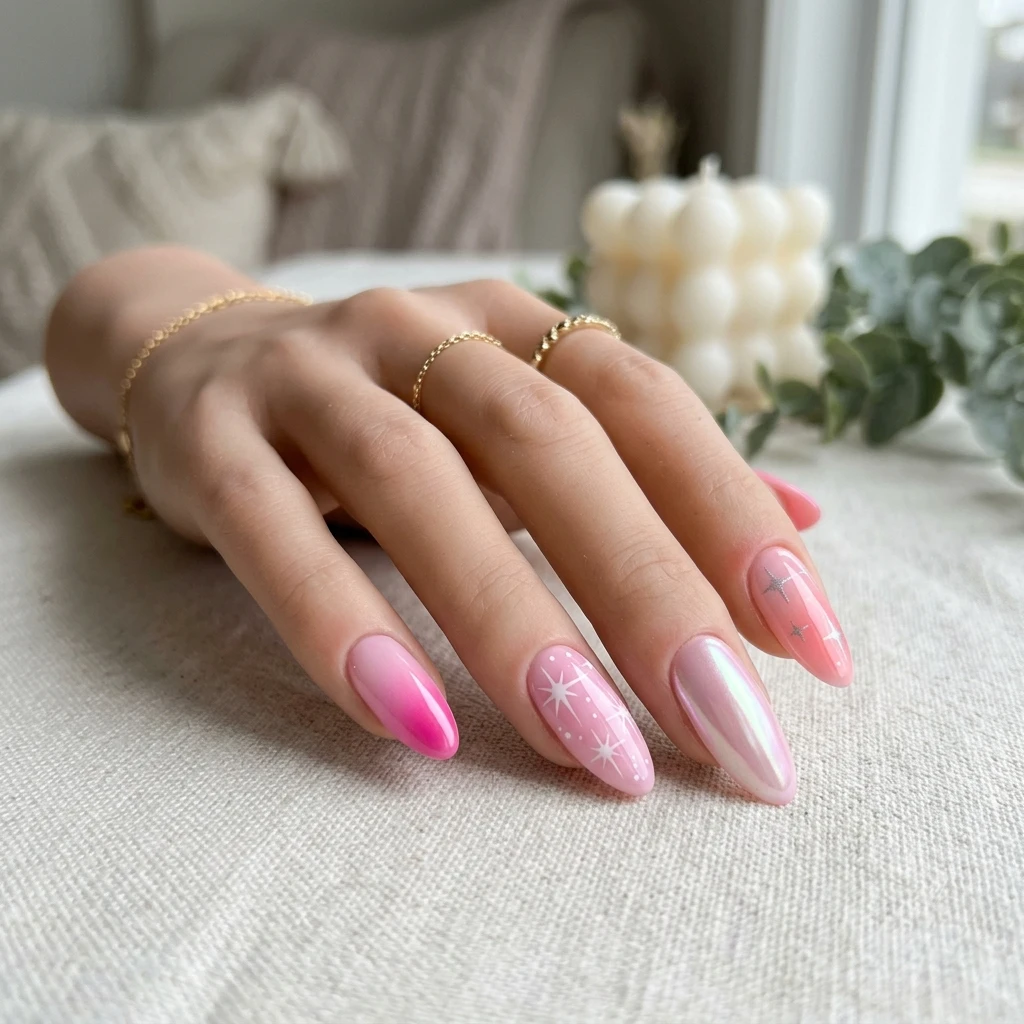
For those who love a futuristic shimmer, combining pink airbrushing with chrome powders is the ultimate choice. This look, popularized by the "glazed donut" nail trend, involves spraying a pink gradient over a white or nude base. After curing and sealing the airbrush paint with a non-wipe gel top coat, a fine chrome powder (like pearl, unicorn, or silver chrome) is buffed over the entire nail surface. The metallic sheen sits on top of the airbrush gradient, creating an ethereal, pearlescent glow that shifts beautifully when caught by the light.
4. Stenciled and Patterned Pink Designs
Airbrush stencils allow you to create crisp, high-definition shapes over your pink gradients. By placing self-adhesive vinyl stencils onto the nail before spraying, you can create negative space designs or layered patterns. Popular Y2K-inspired stencils include stars, hearts, flames, butterfly wings, and retro checkerboards. For example, you can spray a soft pink aura nail, place a heart stencil over the center, and then spray a darker magenta outline. When the stencil is peeled away, it reveals a clean, sharp pink heart surrounded by a dreamy fuchsia mist.
5. High-Contrast Pink Combos
Pink does not have to stand alone. Some of the most striking airbrushed designs combine pink with contrasting colors. A pink-to-red gradient creates a warm, romantic sunset effect, while a pink-to-orange fade offers a tropical, summery vibe. If you prefer an edgy, punk-inspired look, spraying a fuchsia gradient that transitions into deep black at the tips creates an incredible gothic aesthetic. Combining pastel pink with baby blue or lavender creates a cotton-candy celestial design that is perfect for spring and summer music festivals.
Choosing the Perfect Nail Shape for Pink Airbrush Designs
The shape of your nails acts as the frame for your airbrushed artwork. Different nail shapes interact with the spray pattern of the airbrush to create distinct visual profiles.
Almond Shape
Almond nails are tapered at the sides with a rounded tip, mimicking the natural shape of an almond. This elegant, feminine shape is arguably the most popular pairing for pink airbrush designs. The soft, curved edges of almond nails complement the organic, diffused nature of airbrushed gradients. A pink aura design looks exceptionally beautiful on almond nails, as the circular center glow aligns perfectly with the naturally elongated oval shape, making your fingers look longer and more slender.
Coffin Shape
Coffin nails, also known as ballerina nails, feature long, straight edges that taper slightly and end in a sharp, flat square tip. Because coffin nails provide a wide, flat canvas, they are the absolute best choice for stenciled designs. If you want to airbrush detailed starbursts, hearts, or flames in hot pink and white, the flat surface of coffin nails ensures the airbrush paint sprays evenly without distorted edges.
Square Shape
Square nails feature straight side walls and a completely flat tip, forming a sharp angle. This shape is a staple of early 2000s nail culture. Pairing square nails with pink airbrush ombre designs instantly evokes a classic Y2K streetwear aesthetic. The sharp corners of the square tip create a striking geometric contrast with the soft, cloud-like gradient of the airbrush paint, especially when using bright bubblegum pink or neon fuchsia.
Stiletto Shape
Stiletto nails are long, dramatic, and taper to a very sharp point. This daring shape is perfect for high-contrast, edgy airbrush designs. The pointed tip allows you to create a dramatic color fade, where the pink starts heavy at the nail bed and fades completely to white or black at the sharp tip. It creates a bold, claws-out fashion statement that is popular among celebrities.
Oval Shape
Oval nails feature straight sides that round into a smooth, even arch. Similar to almond nails, oval nails are highly flattering and classic. Because they are practical and shorter, they are perfect for everyday wear. A soft, blushing pink airbrush gradient on oval nails looks incredibly clean, quiet, and professional, offering a "your nails but better" look that is perfect for office environments.
Step-by-Step DIY Guide: How to Achieve Pink Airbrush Nails at Home
Achieving a professional-grade pink airbrush manicure at home is entirely possible if you have the right equipment and follow a precise methodology. Follow this step-by-step guide to get flawless results.
- Prep and Prime the Nails: Nail preparation is the foundation of any long-lasting manicure. Begin by pushing back your cuticles, shaping the free edges of your nails with a file, and using a buffer to gently remove the natural shine from the nail plate. This buffing creates microscopic ridges that allow the gel polish to adhere. Wipe away all filing dust using a lint-free wipe saturated with isopropyl alcohol. Apply a thin layer of gel base coat and cure it in your UV/LED lamp for 30 to 60 seconds.
- Apply the Background Color: Choose your background color. If you want your pink airbrush paint to look bright and vibrant, apply two coats of a solid white gel polish, curing each layer completely. If you prefer a soft, natural, or bridal look, opt for a sheer nude or light pink gel base instead. Ensure the background color is fully cured. Tip: Do not wipe away the sticky inhibition layer of the gel, as it helps the airbrush paint stick; however, if your paint is water-based and beads up, lightly buff the background gel and wipe it clean before spraying.
- Set Up the Airbrush Gun and Paint: Connect your airbrush stylus to the air compressor hose. Add 3 to 5 drops of pink airbrush nail paint into the gravity-feed cup. If you are using water-based acrylic airbrush paint, you may need to dilute it with a drop of airbrush reducer to achieve a smooth, milky consistency. Set your compressor pressure between 15 and 25 PSI (Pounds per Square Inch). Holding the stylus away from your hand, test-spray onto a paper towel to make sure the paint is atomizing smoothly and not splattering.
- Apply the Pink Airbrush Technique: Hold the airbrush gun approximately 10 to 15 cm (4 to 6 inches) away from the nail. If you hold it too close, the air pressure will blow the wet paint around, causing it to pool and run. If you hold it too far, the paint will dry in the air, creating a rough, sandy texture. Pull back gently on the trigger to release a fine mist of paint. Spray in quick, side-to-side sweeping motions. Apply the paint in 2 to 3 paper-thin layers, letting each layer dry in the air for 15 seconds before applying the next, until you achieve your desired pink opacity.
- Seal and Protect the Design: Allow the airbrush paint to dry completely (about 60 seconds for water-based acrylics). If the paint is even slightly damp, applying a top coat will smear your art. To prevent the airbrush paint from chipping or peeling, apply a thin layer of clear gel base coat or a dedicated structure gel directly over the dried paint, and cure it. This "sandwiches" the paint between two gel layers. Finally, apply a high-gloss or matte non-wipe gel top coat, making sure to run the brush along the free edge (capping the edge) to seal it completely. Cure for 60 seconds.
- Clean Up and Clean the Gun: Dip a clean-up brush in acetone or isopropyl alcohol and gently wipe away any pink overspray from the skin surrounding your cuticles. Once your manicure is complete, you must clean your airbrush gun immediately. Empty any leftover pink paint from the cup, fill the cup with airbrush cleaner or acetone, and spray it through the gun into a cleaning pot until the spray runs completely clear. Flush backwards (back-flushing) by blocking the nozzle with a gloved finger and pressing the trigger to clean the internal chamber.
Essential Equipment for Airbrushed Nails
Investing in high-quality tools is essential to achieving professional, salon-grade pink airbrush nails. Trying to cut corners with cheap, non-specialized tools will lead to clogged nozzles, splattered paint, and frustration.
- The Compressor: The compressor is the engine of your airbrush setup. For nail art, you do not need a large industrial compressor. Instead, choose a compact, quiet, desktop compressor that features adjustable pressure controls (PSI). Having control over the pressure is critical because spraying thin gradients requires lower pressure (around 15 PSI), while spraying thicker paints or stencil outlines requires slightly higher pressure (around 25 PSI).
- The Airbrush Gun (Stylus): Always choose a gravity-feed, dual-action airbrush gun. A dual-action trigger allows you to control both air and paint flow independently—pushing down on the trigger releases air, while pulling back releases paint. This gives you absolute control over the spray volume. Look for a gun with a 0.2mm or 0.3mm nozzle size, which is small enough to perform detailed work on a tiny nail surface.
- Nail Airbrush Paints and Reducers: Do not use standard nail polish in an airbrush gun, as it will clog the mechanism. You must use paints formulated specifically for airbrushing. You can choose between water-based acrylic airbrush paints (which are easy to clean and dry in the air) or airbrush gel paints (which must be cured under a UV/LED lamp). Keep a bottle of airbrush reducer on hand to thin out the paints if they become too thick.
- Stencils and Masking Materials: To create patterns like hearts, stars, checkmarks, or sharp French lines, you need high-quality adhesive stencils. Look for vinyl nail stencils that stick flat to the nail plate, preventing paint from bleeding underneath. You can also use liquid latex to coat the skin around the nail to make cleaning up overspray incredibly easy.
- Cleaning Kits: A complete cleaning kit includes an airbrush cleaning pot, cleaning brushes of various sizes, a needle tool to clear nozzle blockages, and specialized airbrush cleaner or high-purity acetone. Regular cleaning is the single most important factor in keeping your equipment functioning.
Nail Care and Maintenance for Airbrushed Designs
Airbrushed nail art is incredibly beautiful, but because the paint layer is extremely thin, it requires proper care and maintenance to ensure it does not lift, chip, or peel prematurely.
First, always make sure the paint is completely encapsulated. Airbrush paint is typically acrylic-based, meaning it does not naturally bond to gel top coats. If you apply a gel top coat directly over acrylic paint without capping the edges, the top coat can peel off like a sticker. To prevent this, professional nail techs always apply a thin layer of base gel or structure gel over the dried airbrush paint before applying the final top coat. This sandwiching technique locks the paint in place. Make sure the top coat covers the entire nail plate and caps the free edge completely to keep water out.
Second, protect your hands from harsh chemicals and water. Repeated exposure to hot water, dish soaps, and household cleaning chemicals will weaken the gel bond and cause the airbrush design to lift at the edges. Always wear protective rubber gloves when washing dishes, cleaning the house, or gardening. Additionally, avoid picking or scratching at your nails, and do not use your nails as tools to open cans or peel stickers.
Finally, keep your cuticles and nails hydrated. Apply a high-quality cuticle oil containing jojoba or sweet almond oil at least once a day. Hydrated nails are flexible; when your natural nails flex under pressure, the gel polish bends with them. If your nails are dry and brittle, the gel is more likely to crack and chip, ruining your beautiful pink gradient.
Frequently Asked Questions About Pink Airbrush Nails
Pink airbrush nails can last between two to four weeks, depending heavily on the base and top coat systems you use. If applied using professional-grade gel polish and cured properly under an LED/UV lamp, they will easily last up to a month. If using water-based airbrush paint over regular nail polish, they typically last 7 to 10 days, provided they are sealed thoroughly with a high-quality top coat and the edges are capped to prevent moisture from seeping underneath.
No, standard nail polish is far too thick to be used in an airbrush gun and will instantly clog the nozzle, which typically has a tiny diameter of 0.2mm to 0.3mm. You must use specialized water-based airbrush nail paint or thin airbrush-specific gel polishes. While regular polish can theoretically be thinned down using acetone or lacquer thinners, this is highly discouraged because it can degrade the rubber seals inside the airbrush gun and release harmful volatile chemical fumes into the air.
Whether you need a UV/LED lamp depends on the type of airbrush paint you select. If you use airbrush-specific gel paint, you must cure it under a lamp. If you use water-based acrylic airbrush paint, the paint itself dries quickly in the air without a lamp. However, you will still need a UV/LED lamp if you choose to seal the airbrushed design with a gel top coat, which is highly recommended by professional nail technicians because gel top coats provide superior chip-resistance compared to air-dry top coats.
No, the airbrushing process itself is completely safe and does not damage your natural nails. Any potential damage comes from improper nail preparation (over-filing the nail plate) or incorrect removal (peeling or scraping off the gel instead of soaking it in acetone). The airbrush paint itself is non-toxic and applied in a very thin layer.
To prevent chipping, ensure the airbrush paint is applied in multiple paper-thin layers rather than one thick layer. Let water-based paint dry completely before sealing it. Most importantly, apply a layer of base gel over the dry paint before your top coat, and make sure to cap the free edge of the nail with both the base gel and top coat.
Global Inspiration: Korean, Japanese, and Minimal Styles
Pink airbrush art is a global phenomenon, with different regions offering unique takes on the trend. In South Korea, "Blush Nails" are a massive trend. Inspired by cosmetic blush, this style focuses on a soft, centered pink aura gradient that mimics flushed cheeks. Korean nail art often pairs this blush base with 3D gel droplets (looking like clear water drops), delicate hand-painted cherries, or tiny rhinestones for a cute, clean aesthetic.
In Japan, the focus is on "Nuance Nails." Japanese artists use the airbrush to create moody, abstract backgrounds, blending pastel pink with earthy tones like mauve, sage, or gold leaf. The airbrushed background is then embellished with structural gel, metallic wire art, and shell fragments, creating a highly detailed, museum-like piece of art.
In Western fashion, minimal and clean-girl aesthetics dominate. Here, pink airbrushing is used to create ultra-subtle sheer gradients, often referred to as "lip gloss nails." These designs use a very pale pink mist over a healthy-looking nude base, topped with an extremely shiny gloss to make the nails look healthy, clean, and understated.
Conclusion: Embrace the Soft Glow of Pink Airbrush Art
Pink airbrush nails represent the perfect intersection of Y2K nostalgia, modern cosmetic technology, and artistic expression. The airbrush's ability to create flawless, streak-free gradients, stunning aura halos, and soft French transitions makes it an indispensable tool for modern nail art. Whether you choose to wear a delicate blushing almond nail, a bold fuchsia coffin stencil, or a futuristic chrome-glazed design, pink airbrushing offers an elegant, clean finish that stands out.
While mastering the airbrush gun requires practice—particularly regarding paint dilution and trigger control—the stunning visual results and time savings are well worth the effort. By choosing the right equipment, following a meticulous preparation and application process, and sealing the design correctly, you can enjoy a gorgeous, head-turning manicure that lasts for weeks.